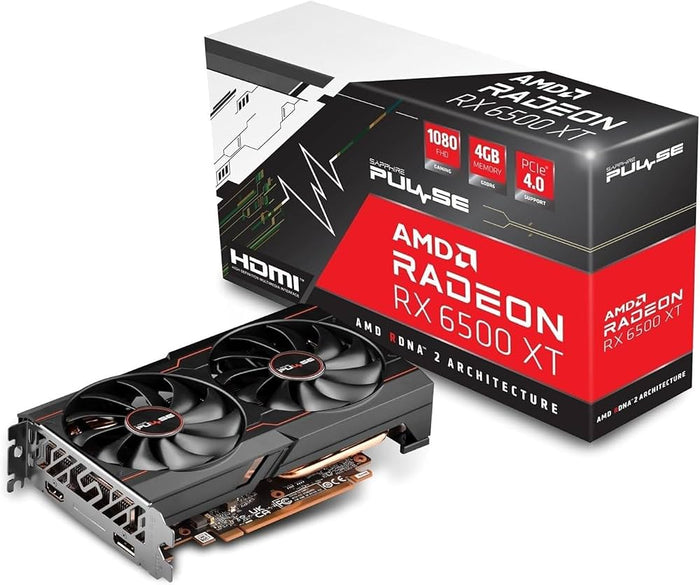

If your pc wont boot after new component installation, power down the system, switch off the PSU toggle, and perform three immediate checks: verify all power connectors (24-pin ATX, 8-pin CPU, PCIe) are fully latched, unseat and firmly re-click your RAM into slots A2 and B2, and reset your motherboard CMOS to wipe legacy hardware settings.
Why Does a PC Fail to Boot After a Hardware Upgrade?
Upgrading your PC should feel rewarding, but pressing the power button to dead silence or a black screen is a common roadblock. Modern PC platforms—especially newer DDR5 motherboards on AM5 and LGA1700/LGA1851 sockets—require exact handshake signals across all components before passing the Power-On Self-Test (POST).
When a new part is introduced, failure to boot usually boils down to five distinct root causes:
-
Incomplete Physical Seating: A RAM stick or graphics card that feels plugged in might actually be a millimeter loose from its retention latch.
-
Mismatched BIOS Settings: Legacy overclocking profiles, XMP/EXPO timings, or custom PCIe generation settings left over in BIOS from your old hardware can corrupt the startup sequence.
-
Insufficient or Improper Power Delivery: Forgetting an auxiliary CPU 8-pin cable, using daisy-chained PCIe cables on high-draw GPUs, or exceeding your power supply unit's (PSU) rated wattage.
-
Outdated Motherboard BIOS: Attempting to drop a newer generation processor into an older motherboard chipset without updating the BIOS beforehand.
-
Pending Memory Training: On modern platforms, initial RAM training can keep the screen completely black for up to three minutes after installing new memory modules.
Understanding whether your system is getting no power at all versus powering on without video output allows you to narrow down the fault rapidly.
Component-Specific Troubleshooting Checklist
Different PC components trigger distinct system behaviors when improperly installed or configured. Follow these targeted steps based on the specific hardware you just upgraded.
1. Troubleshooting New RAM Modules
Memory modules are the single most common culprit for boot failures after an upgrade. If your RAM is not seated with uniform pressure, the motherboard will fail POST and freeze with a DRAM error light.
-
Re-seat with Firm Pressure: Push down on both ends of the RAM stick until the side plastic clips snap shut automatically. You should hear an audible click.
-
Use Correct Slot Priority: On motherboards with four DIMM slots, always install two sticks in Slots 2 and 4 (labeled A2 and B2). Installing RAM in slots 1 and 3 often prevents the system from running at stable speeds or booting altogether.
-
Test One Stick at a Time: If installing multiple new sticks, test booting with a single RAM module in slot A2 first. If it boots, shut down and add the second module.
-
Allow Time for Memory Training: If you upgraded to DDR5 RAM, do not interrupt the first boot. The motherboard needs 1 to 3 minutes to test and train memory timings, during which the screen will remain black and fans may run at high speeds.
2. Resolving pc no display after gpu install
A dedicated graphics card upgrade is exciting, but experiencing a pc no display after gpu install situation is extremely common for first-time builders.
-
Check Cable Placement: Ensure your HDMI or DisplayPort cable is plugged directly into the port on the graphics card, not the motherboard's rear I/O panel.
-
Verify PCIe Power Cables: High-end graphics cards require dedicated 8-pin or 12VHPWR (12+4 pin) PCIe cables from the PSU. Never use SATA-to-PCIe adapters, and avoid daisy-chained "pigtail" splitters on cards drawing over 220W.
-
Confirm Complete Slot Engagement: The GPU's gold contacts must be fully buried inside the top PCIe x16 slot, and the plastic latch at the rear of the slot must snap into place.
-
Disable Integrated Graphics Conflicts: If your CPU features integrated graphics, legacy BIOS settings or old display drivers (like previous Nvidia or AMD drivers) might cause display routing errors. Use Display Driver Uninstaller (DDU) in safe mode before removing old hardware.
3. Troubleshooting New CPU or CPU Cooler Installs
If you replaced your processor or installed a new liquid/air cooler, a no-boot issue points toward socket integrity or power delivery.
-
Verify BIOS Compatibility: Newer CPU generations often share a socket with older motherboards, but require a BIOS update to run. If your motherboard has a "BIOS FlashBack" button, update the BIOS using a USB drive without needing a booting CPU.
-
Inspect CPU Pin Integrity: Remove the processor and inspect the socket pins on LGA motherboards (Intel and AMD AM5) or CPU pins on PGA chips (AMD AM4). Even a single bent or misaligned pin will cause memory channel failure or complete boot refusal.
-
Check the CPU_FAN Header: Motherboards will intentionally halt the boot process if no cooling fan is detected on the primary
CPU_FANheader to prevent thermal damage. Ensure your cooler's fan or pump tachometer cable is connected toCPU_FAN, notSYS_FAN.
4. Storage and PSU Upgrades
Adding a new M.2 NVMe SSD or swapping your power supply can alter your boot order or interrupt power routing.
-
Verify Drive Boot Priority: Adding a secondary storage drive can cause your motherboard BIOS to reprioritize drive order, attempting to boot from an empty drive instead of your primary Windows SSD.
-
Never Mix Modular PSU Cables: If you upgraded your power supply, only use the cables provided with the new PSU. Pinouts on the power supply side are not standardized across brands or models, and using old modular cables can permanently damage your components.
Diagnostic Matrix: Symptoms vs. Solutions
Use this quick-reference matrix to cross-match what your PC is physically doing with the most effective troubleshooting step:
| Visual/Audible Symptom | Likely Cause | Immediate Action |
| No power, no lights, no fan spin | Loose 24-pin ATX cable, PSU switch off, front panel header disconnected | Toggle PSU switch to 'I', verify wall socket power, bridge power pins with a screwdriver to test front panel switch |
| Fans spin, RGB lights up, but screen is black | Unseated RAM/GPU, pending DDR5 memory training, display cable in motherboard | Re-seat RAM into A2/B2, move video cable to GPU, wait 3 minutes for memory training |
| PC turns on for 2 seconds then shuts off in a loop | CPU 8-pin power missing, cooler mounted too tightly, short circuit | Plug in CPU 8-pin EPS power connector, back off cooler mounting screw pressure slightly |
| Boots straight to BIOS, won't load Windows | Boot mode mismatch (CSM/Legacy vs UEFI), drive order changed | Enable/disable CSM mode in BIOS, verify Windows OS drive is set as Option 1 in Boot Priority |
| Motherboard LED stays stuck on DRAM or VGA | Unstable XMP/EXPO profile, GPU loose in PCIe slot | Reset CMOS after upgrade to clear BIOS memory profiles, re-seat GPU |
How and When to Reset CMOS After an Upgrade
Performing a reset cmos after upgrade is the most reliable way to clear stored hardware configurations, overclocking profiles, and custom voltage settings that conflict with newly installed components. Clearing the CMOS resets your motherboard BIOS back to factory default state without deleting your installed files or operating system.
Option 1: The Clear CMOS Jumper Method (Fastest)
-
Turn off your PC and flip the switch on the back of the power supply to "O" (Off). Unplug the power cable from the wall.
-
Locate the two pins labeled
CLR_CMOS,JBAT1, orCLRTCon your motherboard (check your motherboard manual for exact placement). -
Touch a metal-tipped screwdriver across both pins simultaneously for 10 to 15 seconds to bridge the connection and discharge stored settings.
-
Remove the screwdriver, plug in the power cable, switch the PSU back on, and start the system.
Option 2: Removing the CR2032 Coin-Cell Battery
-
Disconnect all external power cables from the PC case.
-
Locate the round, silver CR2032 lithium battery on the motherboard (often positioned below the primary PCIe slot).
-
Gently press the metal retaining clip on the side of the socket to release the battery.
-
Leave the battery out for 5 to 10 minutes, and press the PC case power button a few times to drain residual power from motherboard capacitors.
-
Reinsert the battery, reattach power, and turn on the PC.
Upon your next boot, the system will prompt you to press F1 or DEL to enter setup and reconfigure basic BIOS defaults.
Systematic Isolation: Using Debug LEDs and Breadboarding
If basic checks fail to resolve the problem, use your motherboard's built-in diagnostic tools to pinpoint the faulty part.
Decoding EZ Debug LEDs
Most modern budget and mid-range motherboards (from ASUS, MSI, Gigabyte, and ASRock) feature four small diagnostic LEDs near the 24-pin power connector labeled CPU, DRAM, VGA, and BOOT.
-
CPU Light Solid: Indicates an undetected or dead processor, bent socket pins, missing 8-pin CPU power, or an incompatible BIOS version.
-
DRAM Light Solid: Points to unseated memory, incompatible RAM sticks, or a failed memory channel on the CPU memory controller.
-
VGA Light Solid: Indicates the motherboard cannot detect a display output device. Check GPU PCIe power, re-seat the card, or test a different display cable.
-
BOOT Light Solid: The hardware passed initial checks, but no bootable operating system drive was found.
Breadboarding (Testing Outside the Case)
If you suspect an invisible electrical short between the motherboard and your PC case standoffs, perform a minimal boot test outside the case:
-
Place your motherboard on top of its non-conductive cardboard box (never on anti-static bags, which can conduct electricity on the outside surface).
-
Install only the CPU, CPU cooler, one stick of RAM in slot A2, and power supply connectors (24-pin ATX and 8-pin CPU).
-
Connect your monitor to integrated graphics (or insert the GPU if your CPU lacks integrated graphics).
-
Short the two power switch pins on the front panel header using a flathead screwdriver to turn on the board.
If the system POSTs successfully outside the case, an extra metal standoff or pinched wire inside your PC case was causing a short circuit.
Frequently Asked Questions
Q: Why won't my PC boot after installing new RAM?
Your new RAM modules are likely either improperly seated or running into frequency conflicts with previously saved XMP/EXPO profiles in your BIOS. Ensure you apply firm pressure until the slot retention clips snap closed, install sticks in slots A2 and B2, and reset your CMOS to wipe old memory profiles so the motherboard can train the new RAM cleanly.
Q: What does it mean if my PC boots but shows no display after a GPU install?
This usually means your display cable is plugged into the motherboard I/O rather than the new graphics card, or the GPU is not receiving sufficient power. Confirm that dedicated PCIe power cables (not daisy-chained pigtails) are fully clicked into the GPU, verify the card is latched securely into the top PCIe x16 slot, and ensure your monitor is plugged directly into the graphics card.
Q: Should I reset CMOS after every hardware change?
While minor upgrades like adding an extra SATA drive do not require a CMOS reset, performing a CMOS reset after replacing major components like the CPU, RAM, or graphics card is strongly recommended. Resetting the CMOS clears legacy voltage parameters, timing profiles, and hardware allocation maps, ensuring your motherboard detects new hardware without boot conflicts.